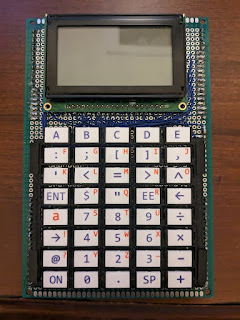
As part of all the keypad tests for my presentation at the 2023 Hewlett-Packard Handheld Conference, I built a keypad and new hardware for my 6507 Graphing Calculator. The keypad itself is laser-cut white acrylic with dye sublimated labels. A local business cut the acrylic for me since I didn't have my laser cutter yet. My design for the laser cuts left a tab at the top of each key so it would stay connected to the larger piece for applying the labels. The remnants of snapping the keys off their tab are visible on the top of each key. The keypad itself is not that great since the keys on the left and right edges don't flex enough and need a lot more pressure to actuate than the other keys. I made sure to add extra space on the edges of the next keypads made on my laser cutter so the keys can flex enough.
The original board for this project got pretty cramped toward the end of soldering it. There was no separate address or data bus space on the board, so bus lines were soldered directly from the pins of one chip to another. This saved a little bit of room but was harder to keep straight as I added more chips. The new board (below left) had a dedicated area by the oscillator on the bottom left for all the bus lines which is much cleaner. One tricky thing about the new board is that the buck converter on the top left never put out the correct voltage so I ended up using a separate module (not pictured) from Adafruit. It would be nice to find a switching power supply chip that works reliably on protoboard, but I'll stick with modules like these for projects that need a lot of current for now.
