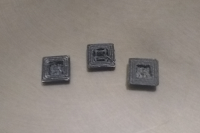
 The last few weeks I have spent a lot of time on the keypad for my Tiny Calculator project and the results are a little surprising! After considering a lot of different ways to make caps for the keys, I finally bought a 3D printer, specifically an Ender 3. Before that, I tried using an Xacto knife to cut out a base and a slightly smaller square post from PVC I bought at the craft store. The result was pretty uneven and there didn't seem to be any way to make them all exactly the same size, so I bought the 3D printer the same day. It was easy to put together and has produced great prints from the very first time I tried it!
The first thing I worked on was designing a button cap with a skirt that would keep it from falling out of a grid overlay. It was really easy to do in OpenSCAD. I printed several versions to get the dimensions right and design a hole in the base so it would fit over the posts of the tactile switches. The first version was black and looked really nice. Next, I started on the overlay and experimented with several versions. One that was only 0.5mm thick fell apart when it came off the raft it was printed on, and I eventually settled on 1mm for the thickness. As I experimented with improving it, I added supports that fit over the header pins on the keypad to keep everything straight and holes for longer pins to keep the grid attached. This worked really well to keep the keys straight and attached but the grid was still a little flexible because it was so thin, so I added a 3mm wall around the edge which made the print very rigid.
The buttons themselves were printed with the holes for the posts facing down. The slicer program inserts tiny supports to keep the hole from collapsing while the button is being printed. It took a long time to carve the supports out and the results ended up being a little uneven. Some of the holes were slightly too deep and the entire button post fit in them with no clearance for the button to be pressed. This led some buttons to have a stronger click and some to stick up farther than the others. One thing I tried to make them more even was to print them in rows of five with the hole facing up. The hole depths all turned out extremely uniform but the lip holding them together came out garbled and they easily broke apart since the lip had to basically be printed parallel to the ground with no support. The next time, I turned the row of five on its end, which worked since I had removed the lower skirt edge to make room for the lip holding them together. Printing five of them in a row like this makes the button presses more uniform and the rows straighter.
The design for the keys labels was done in Google Sheets and copy and pasted into Paint. This worked really well! It was way easier to make modifications and keep all the text uniformed and aligned than doing it in Gimp, which I tried a few months ago. Once I had the design, I went to Staples and had them printed on overhead transparencies. Unfortunately, there is no way to print in white on a standard printer, so you couldn't see anything when the labels were put on black buttons. I bought a roll of white plastic and now the labels look exactly how I planned. For the next iteration, I bought a cheap inkjet printer and transparency paper so I can make the labels myself. They are printed in reverse so I can glue the ink side down and avoid smudges from finger presses. I designed and printed a little bracket for cutting out the labels at exactly the right size, but it turned out not to be useful. Super gluing all of the labels on took a couple tries to get right, but I'm very happy with the result! Now that I have the 3D printer, I plan to make similar keypads for some of my other projects.
 |
| Keypad labels |


No comments:
Post a Comment