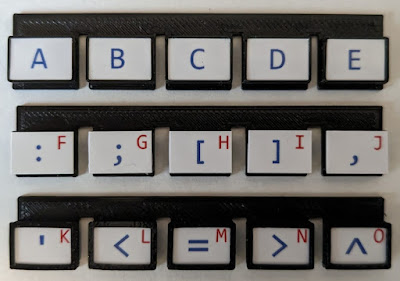
As described in my 2023 goals post, my plan for the year was to finish enough projects to give a presentation at the 2023 Hewlett-Packard Handheld Conference (HHC). Even though I didn't finish everything on my list, there were still enough interesting things to give a presentation on including my Blinky Robot and 6507 Calculator Forth Virtual Machine. The largest part of the presentation was about building calculator keypads.
While building a circuit board or writing the firmware for a calculator are achievable goals for a hobbyist or amateur, building a keypad tends to be much more challenging. The keys themselves can be made on a 3D printer, but getting good quality labels on the keys is very difficult. Since none of my calculator projects so far have had really good keypads, I decided to try every method available for making keys to compare the results.
3D Model
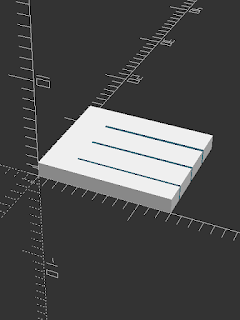
The 3D model for the test consists of eight rows of five keys each designed in OpenSCAD for my still unfinished 6507 Graphing Calculator. OpenSCAD has been my go-to program for modeling since I started with 3D printing a few years ago. The biggest advantage of this program is that the entire model is specified by a script so nothing needs to be manipulated or placed by hand. This works well for people like me who don't have a lot of artistic talent but feel comfortable with programming. It's cheap and relatively quick to print out a set of these keys on my Ender 3.
The design above is an SVG image generated by a Python script which is a strategy I have been using more and more recently since it's so convenient. Like with OpenSCAD, it's very powerful to be able to do the layout with code rather than a mouse. It was also easy to change the design around as necessary for further tests once the Python script was set up. Another thing that worked well was generating PNG files directly with the graphics.py Python library instead of SVG which was necessary for some of the later tests. Converting the SVG to PNG for printing turned out to be surprisingly difficult. Some text that was rendered correctly in Chrome would be the wrong size, misaligned or not render as a character when imported into Inkscape, GIMP, or conversion websites like ezgif.com. What worked best was a Chrome extension called SVG Export, although unfortunately it blends the edges of lines when exporting which isn't ideal when the image is laser cut for example. Another problem with using PVC cards is that the labels are not printed out at the exact right physical size even though the PNG file was accurate down to the pixel for the CR80 card size. The workers at the printing place explained that the image needed to be at an exact size in inches to come out correct, but doing it that way came out even less accurate. What worked in the end was squeezing all 40 labels onto a single card and having it printed out as a business card by VistaPrint which only charged about $40 for 50 cards.
"A":"20 >R0 100 Y R0> LU 0 DUR PX> 100 X 100 Y R0> LU 0 DUL >X LL 0 X 50 Y 100 LR",
"B":"25 >R0 15 >R1 100 LD 100 R0> - LR 100 DR PY> 50 R1> + LU PY> - >Y 50 DUL PX> >X >R9 50 R1> - DUR PY> >Y SWAP - LU 0 DUL 0 LL R9> X 50 Y 0 LL","C":"20 >R0 R0> Y 0 DUR PX> >X 100 Y 0 DL R0> LU 100 X R0> Y 0 DUL DUP LL 100 Y 100 SWAP - LR 100 DR",
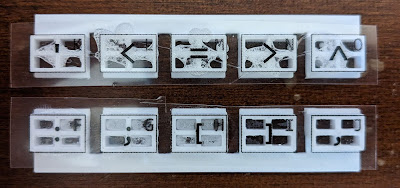
The next iteration was a two-part mold with an opening to pour plastic into and sprues to let air and excess plastic escape. The mold is kept an an angle so the air bubbles will rise toward the sprues. These types of plastic parts are often made with a pressure chamber to eliminate bubbles, but it wasn't necessary in this case since there were very few bubbles. The resulting parts were good quality and took dye sublimation well, although some of the rows were a little warped which I think is due to taking them out of the mold too soon.
Another option is a company like ShapeWays that can fabricate parts using different 3D printing technologies than a consumer 3D printer or in other materials such as metal. The biggest obstacle to this was getting the textures onto the model. This should be an easy task, but something broke down between importing the STL file generated by OpenSCAD, applying the textures, exporting the result as an OBJ file and previewing the design on the ShapeWays website. The preview showed either no textures or the same texture from one one key on 10 or more other keys. Part of the problem was uploading files to ShapeWays with spaces in their filename which is an odd limitation not mentioned on the website. Customer support also explained that putting one texture per key was causing problems and that a single texture would work better. The ShapeWays preview is not totally to blame, though, since just saving or exporting the file with textures applied and opening it in another program usually didn't work either whether I tried with a well-regarded program like Blender or half a dozen other modelling programs. Surprisingly, what worked in the end was opening the STL file in Microsoft 3D Builder and applying the textures there.


No comments:
Post a Comment